

 Nederlands
 Deutsch
Overhaul JBL Atlas woofer
The JBL Atlas woofer is a very powerful small woofer. The Atlas woofer is used in many JBL and Harman Kardon mobile devices. The Atlas woofer has been used in:
Harman Kardon Go + Play (G1-G2)
Harman Kardon Go + Play micro (G1-G2)
JBL Spyro
JBL On Beat Xtreme
JBL Radia
JBL On Stage 400P
The design of the woofer ensures that the woofer can make relatively large movements. That is why the woofer has a very good 'bass performance'.
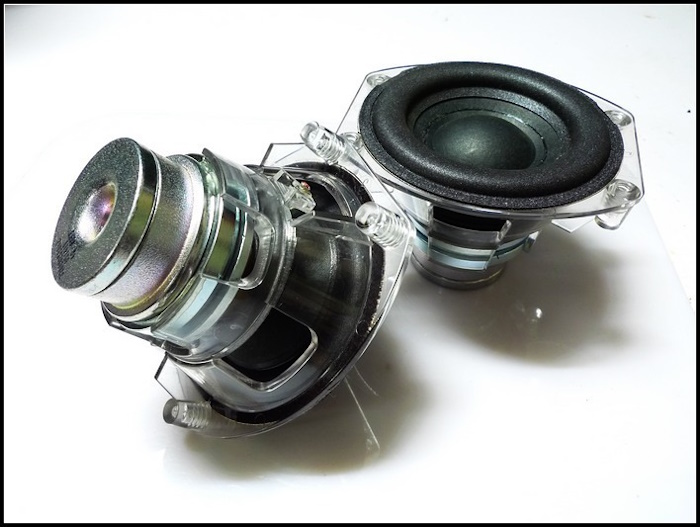
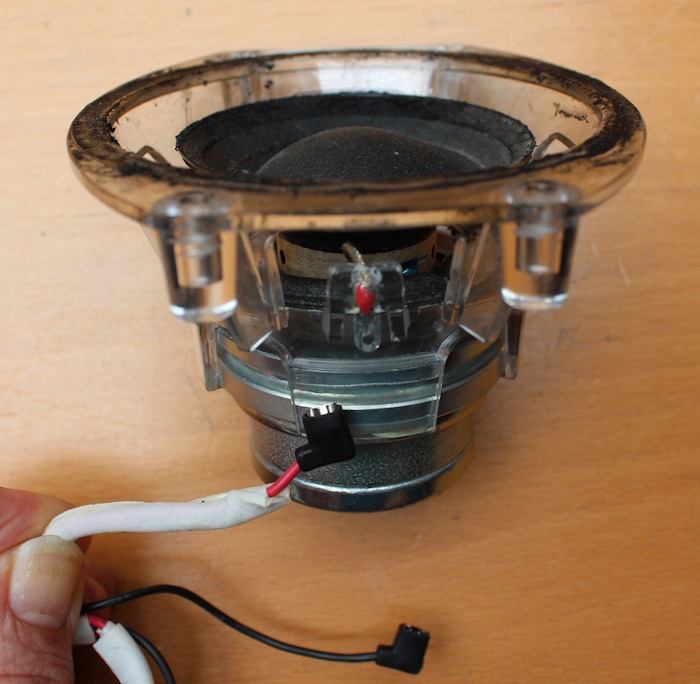
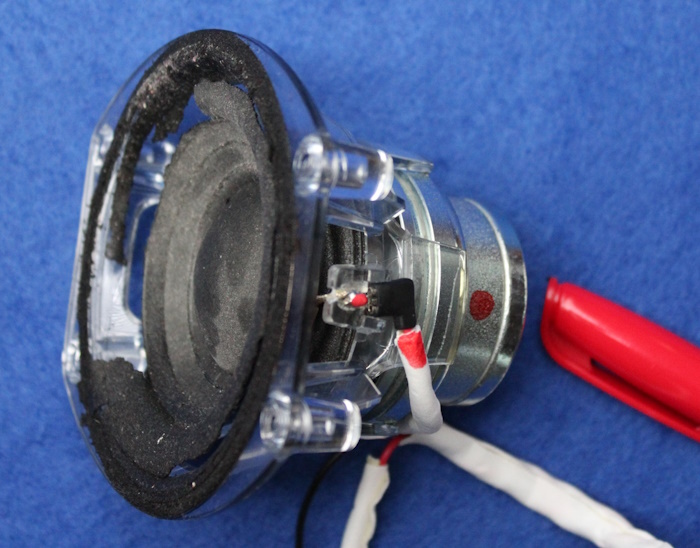
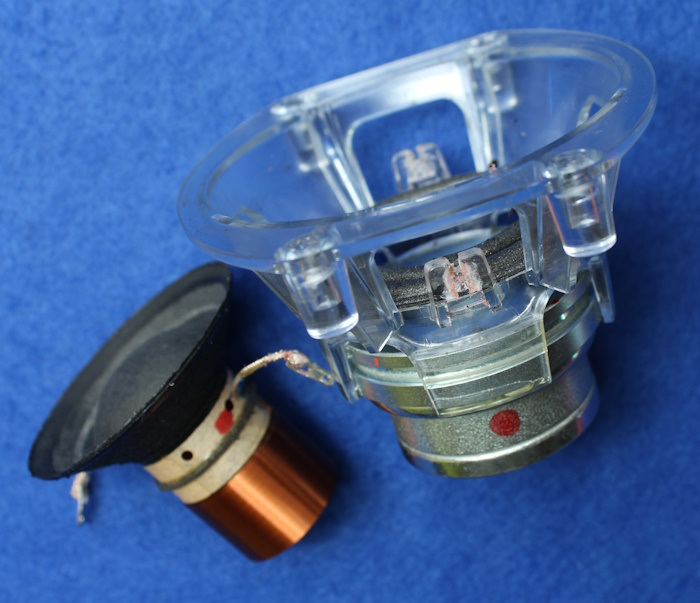
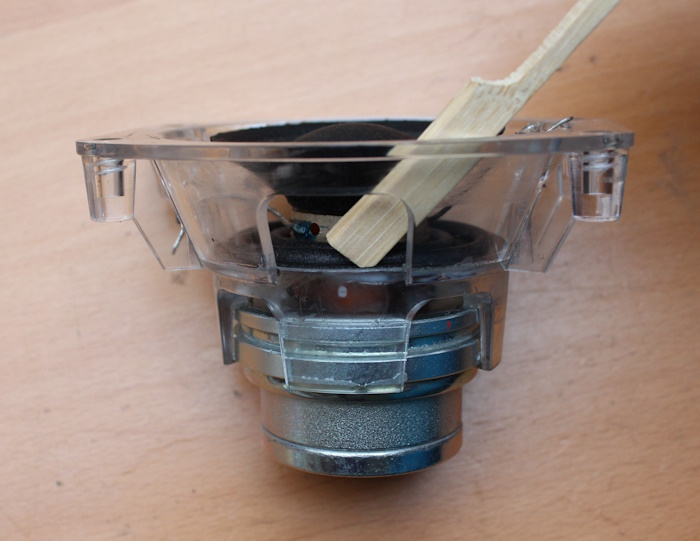
The JBL Atlas woofer in defective condition:
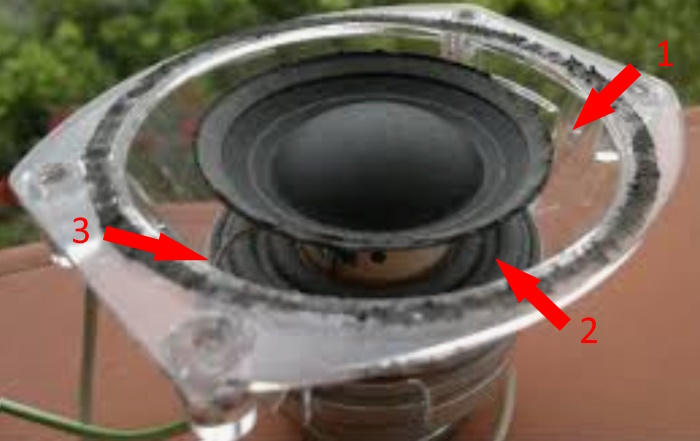
Unfortunately, both the surround (photo above: 1) of the Atlas woofer and the spider (photo above: 2) are made of foam. This foam decays relatively quickly. The woofer needs to be overhauled at some point. The foam surround breaks down before the spider does. Eventually, the spider will also fail. In this manual we explain how both the foam surround and the spider can be replaced. This gives the Atlas woofer a second life. If the spider is still intact, only the foam surround needs to be replaced. This manual explains how that works.
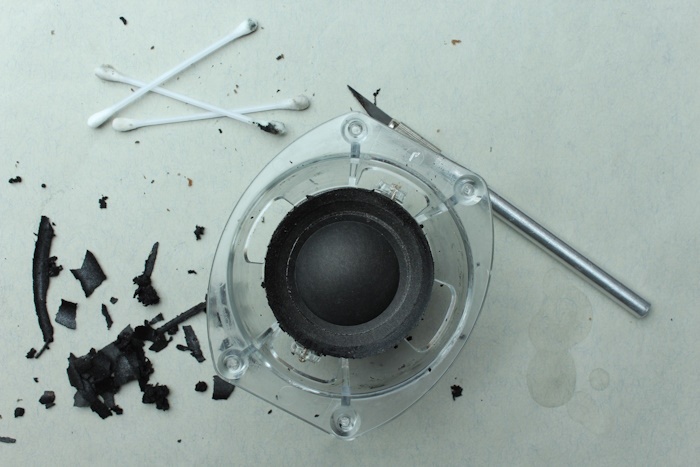
The following applies to every (speaker) repair: carry out the work on a piece of cardboard or an old newspaper. The foam residues give dirty stains that are difficult to remove.
A number of parts are required for this repair:
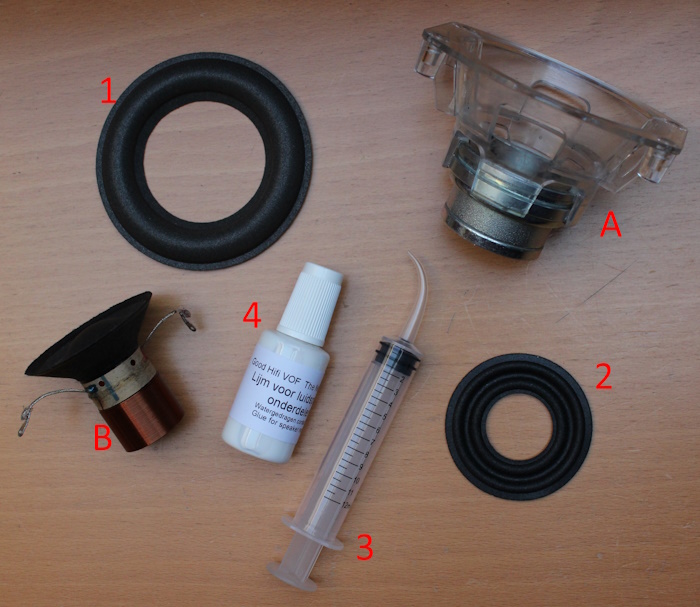
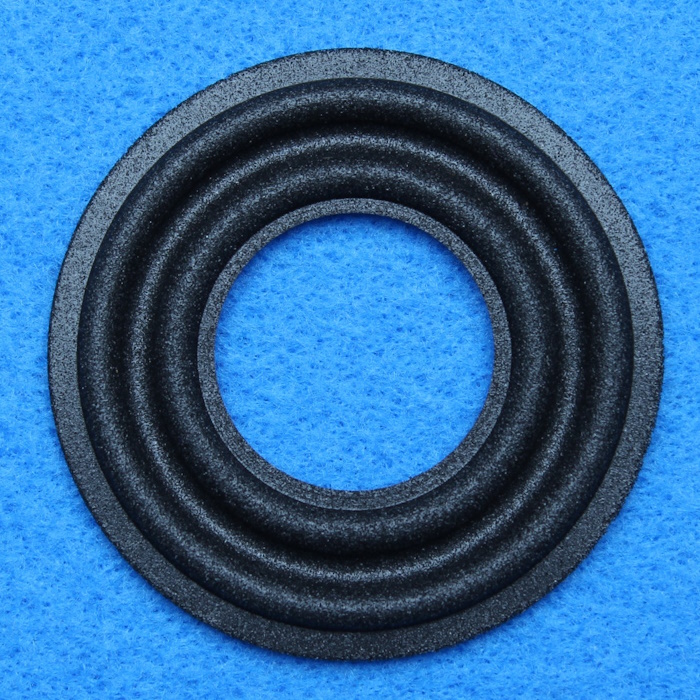
- Foam surround for JBL Atlas woofer
- Spider for JBL Atlas woofer
- Syringe for applying glue in hard-to-reach places
- Glue, to glue the foam surround and the spider
The photo also shows the woofer frame (A) and the interior of the woofer (B).
Now... Let's get started.
Remove the woofer from the mobile device
Remove the JBL Atlas woofer from the mobile device. The method varies per device. There are many manuals on youtube that explain how to open the devices.
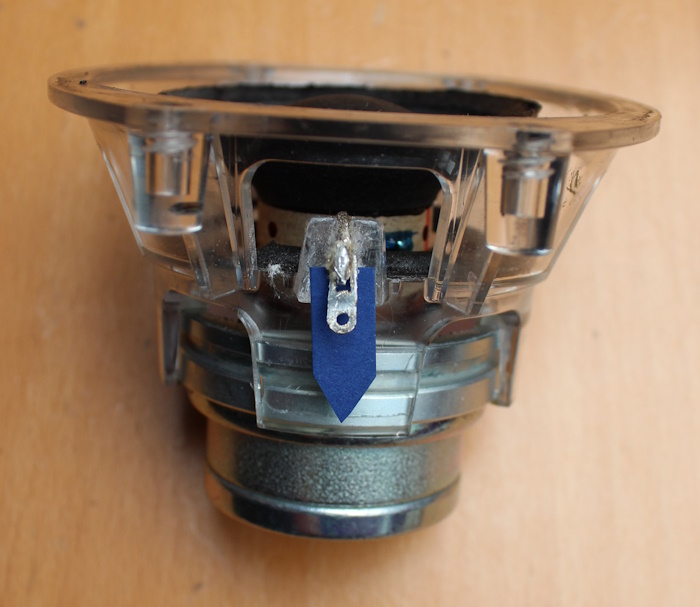
Mark!
The woofer is completely disassembled, but must also be put back together. In the right way. That's why we mark one side of the woofer.
On the side with the red wire, we mark the terminal (connection), the wire and the magnet with a red dot. For this we use waterproof ink (permanent marker). This way we know later which side of the woofer should go into which side of the woofer frame, and which cable should be connected to it.
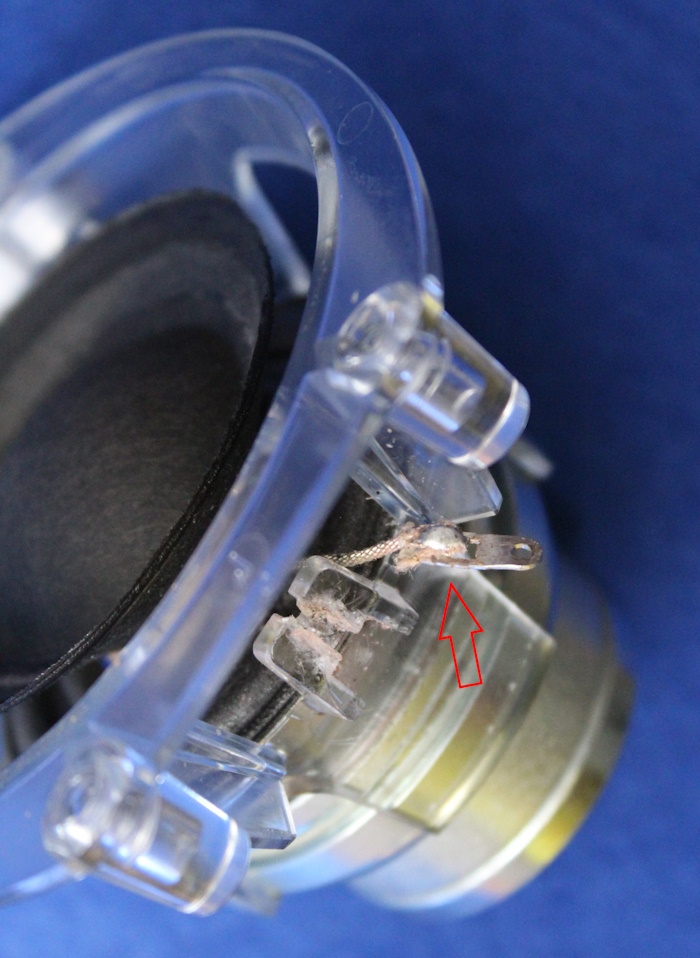
Remove glue from terminals
The terminals (connections) are glued to the woofer frame. Remove the glue so that the terminals can be detached.
When the glue has been removed, the terminal can be detached by moving it downwards (direction of the blue arrow in the photo).
The terminals are loose
Remove the terminal from the holder and make sure that the terminal and the connected (tinsel) wire hang freely.
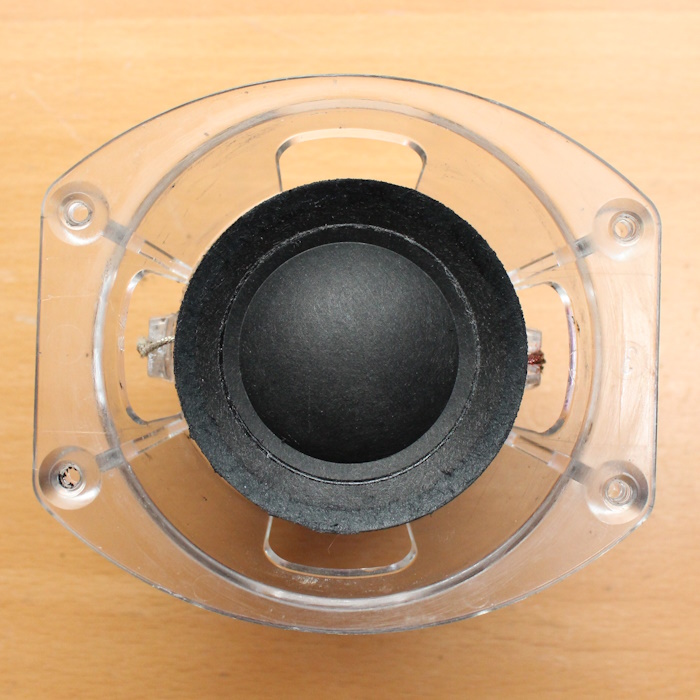
Remove the interior from the woofer frame
When the terminals are loose, the interior can be 'lifted' out of the woofer frame. The spider is often torn all around.
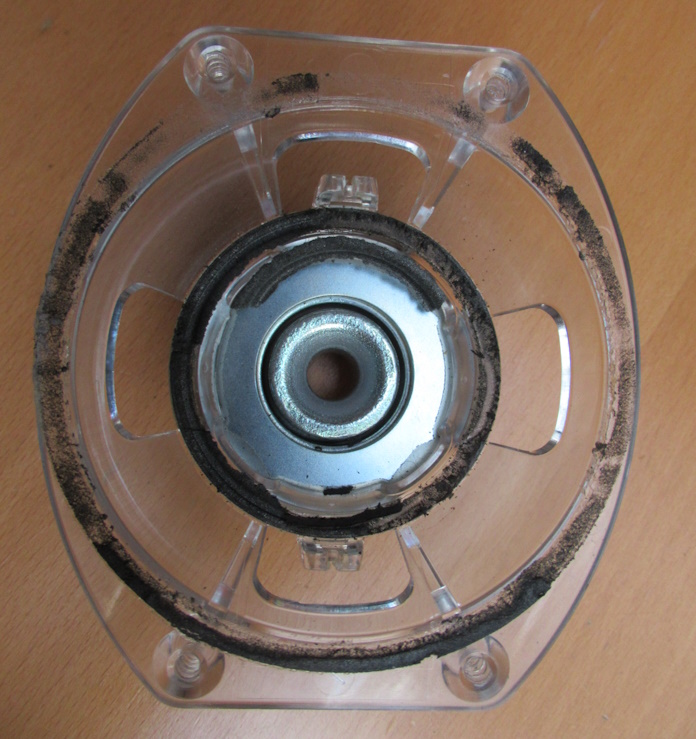
Remnants of the old spider and the old foam surround can still be seen on the woofer frame. There are also remnants of the old spider on the coil of the woofer. These must be removed.
Clean the woofer frame
Step 1: Shake Empty....
The interior has been removed from the woofer. There are often foam residues on the magnet. Those must be removed. Hold the woofer upside down and shake off the foam pieces.
Step 2: Protect (the Air Gap)
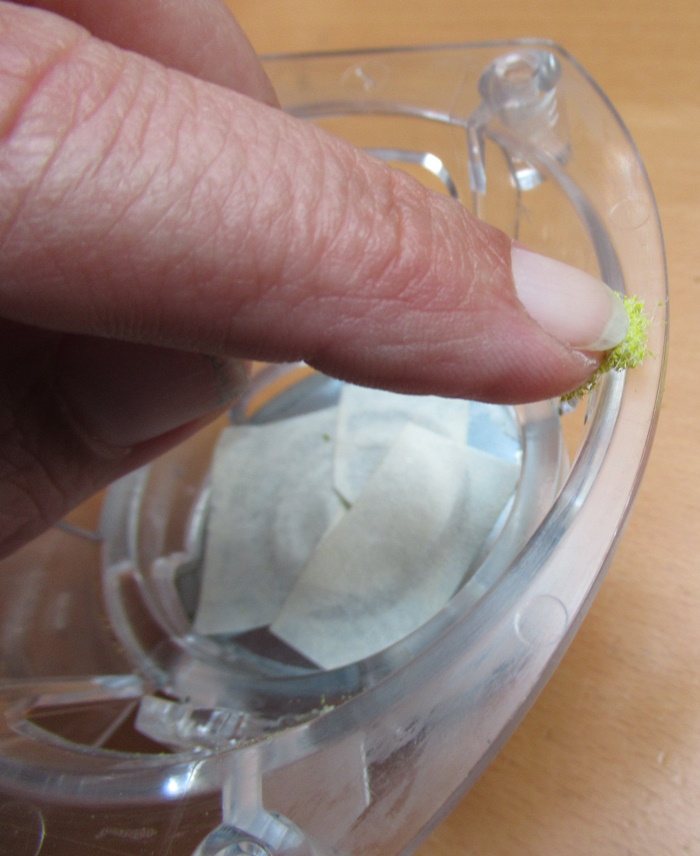
To prevent the air gap of the magnet from being polluted with foam residues, it is taped off. We tape the magnet with masking tape.
Step 3: Remove the foam remnants from the foam surround and the spider of the woofer frame
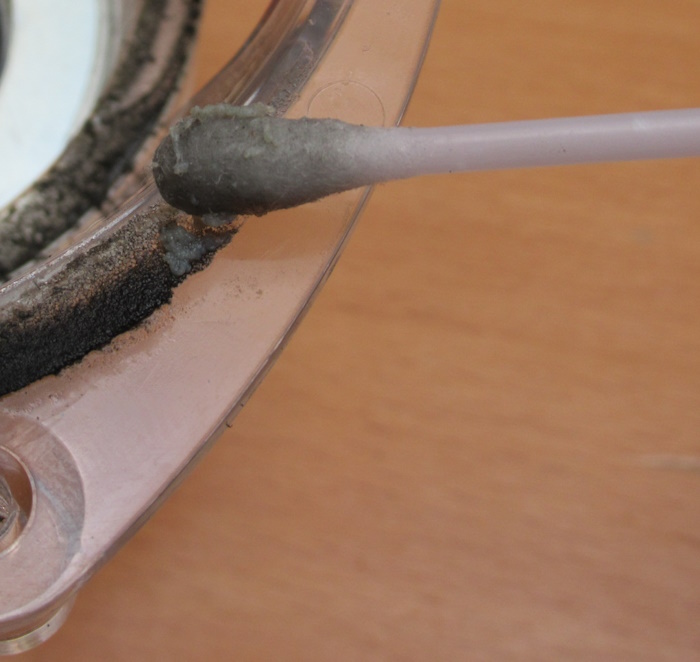
Now remove the foam residues with a solvent (we use alcohol). Remove both the foam residues from the foam surround (on top of the frame) and from the spider (in the frame).
After cleaning with a cotton swab & alcohol, the frame can be roughened with a scouring pad and some alcohol.

Make sure the frame is completely clean, as in the photo above.
Clean the air gap of the magnet
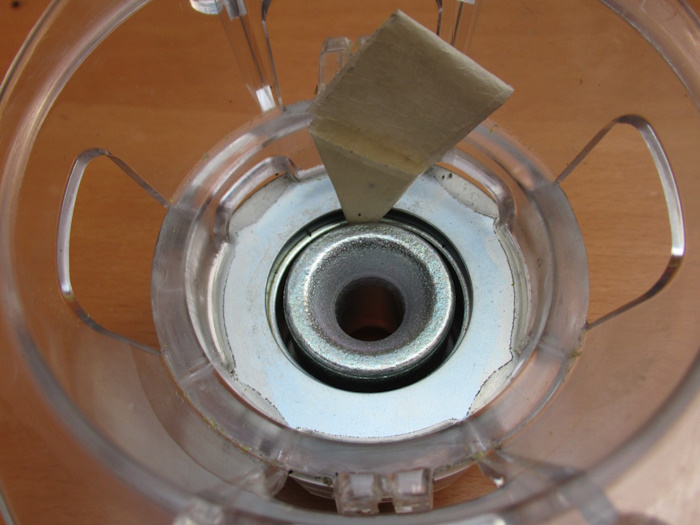
Remove the tape covering the air gap. Make a 'glue trap' from (folded) painter's tape / masking tape (sticky side on the outside) and move it through the air gap. Dirt in the air gap sticks to the tape and the air gap is thus cleared of dust and other debris. If you have compressed air, you can also use compressed air to blow the gap clean,
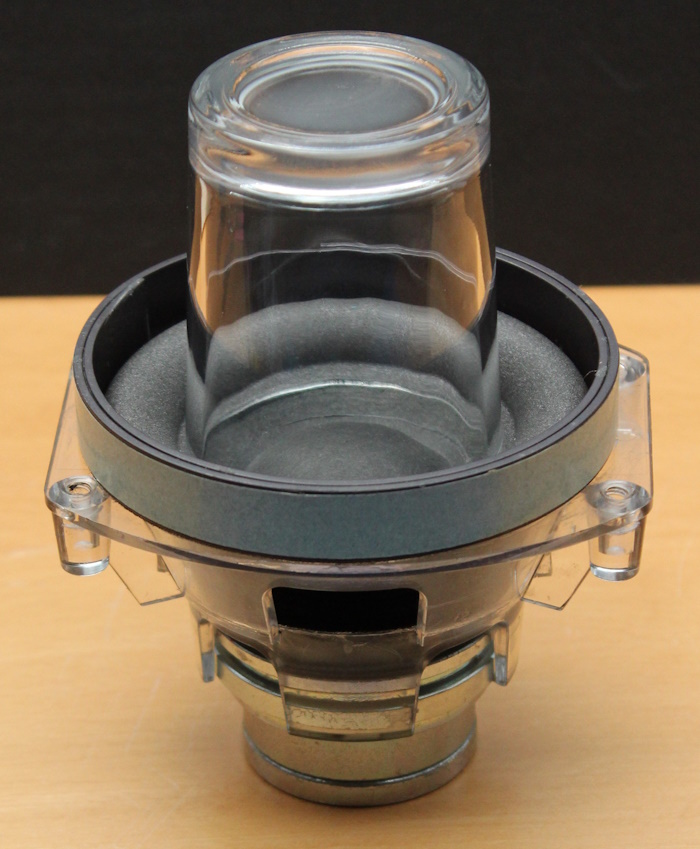
Clean the voice coil
Now that the woofer frame is clean, it's the turn of the 'inside'. The coil of the woofer still contains remnants of the spider, which must be removed. To prevent the voice coil from being deformed, we place it on a piece of wood. So we do not have to touch the coil itself.
If you are unsure about where the new spider should be glued, you can use a marking to indicate at what height the spider should be glued. Preferably do this not with a pencil (dusty) but with ink.
Carefully remove the foam residue from the coil.
Clean the cone
Now remove the foam remnants from the cone. A little bit of glue may remain on the cone, that's okay. Do not apply too much force. For the clarity of the photo, the cone has been removed from the wooden stick, but it is most convenient to clean this cone while it is still on the stick. This way you don't have to touch the voice coil.
Then use a cloth with alcohol to clean the cone and the coil from dust and foam residue.
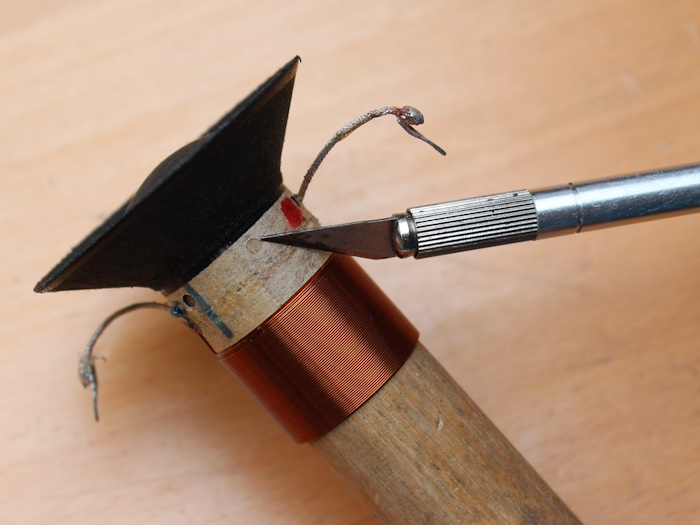
Apply glue to the coil, here comes the new spider
Apply glue to the coil, at the same height as the old spider, this is easiest done with a syringe. A brush can also be used if necessary.
Then slide the spider into place from below. The spider must be placed so that the bulges point upwards. Make sure that the spider is properly glued horizontally, perpendicular to the coil.
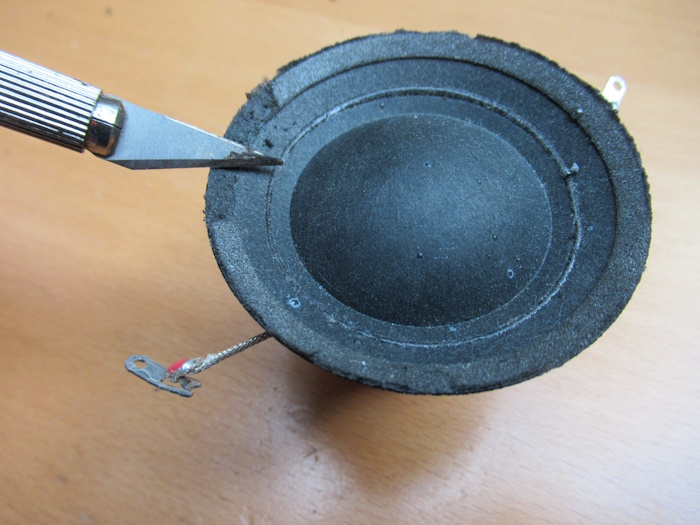
Top of the spider, bulging 'up':
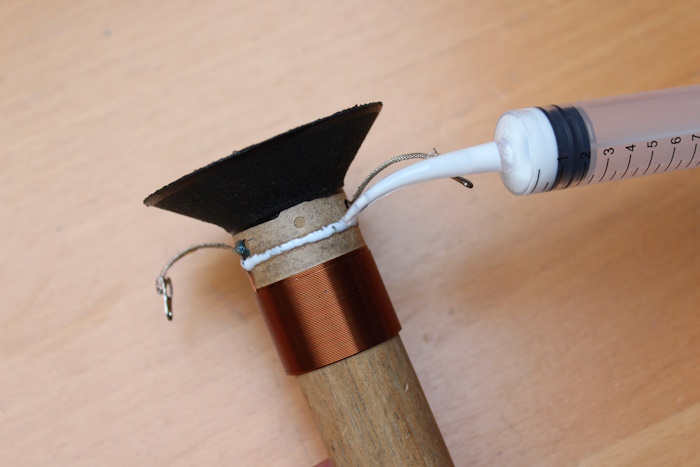
Glue the spider to the woofer frame

Apply glue to the adhesive edge of the spider. Also apply glue to the adhesive edge of the woofer frame. Then carefully lower the spider into the woofer frame, the voice coil of the woofer disappears in the air gap of the magnet.
Note: make sure the spider is glued in such a way that the terminals end up in the right place on the woofer frame - at the holders where the terminals were originally glued. Also make sure that the red marked terminal is on the red marked side of the woofer frame.
Then press the spider firmly onto the adhesive edge of the woofer frame with a wooden spatula:
This is what the woofer looks like when the spider is glued:
Note: the cone does not protrude above the woofer frame.
Glue the foam surround to the cone
When the glue of the spider is dry, the foam surround can be glued to the cone and the frame.
Coat the inner and outer edges of the foam surround with glue. Also coat the cone and the woofer frame with glue. Then glue the foam surround on the woofer cone and on the frame.
Insecure? Do it in two steps. First glue the foam surround to the cone, then when the glue has dried, glue the foam surround onto the woofer frame.
If necessary, a weight can be placed on the parts to be glued to keep them in place.
The final work
Finally, the terminals must be glued into the holders of the woofer frame. Slide the terminals into their holders from below and glue them in place. Speaker glue can be used for this. When the glue is dry, the plugs can be connected to the terminals.

Finished!
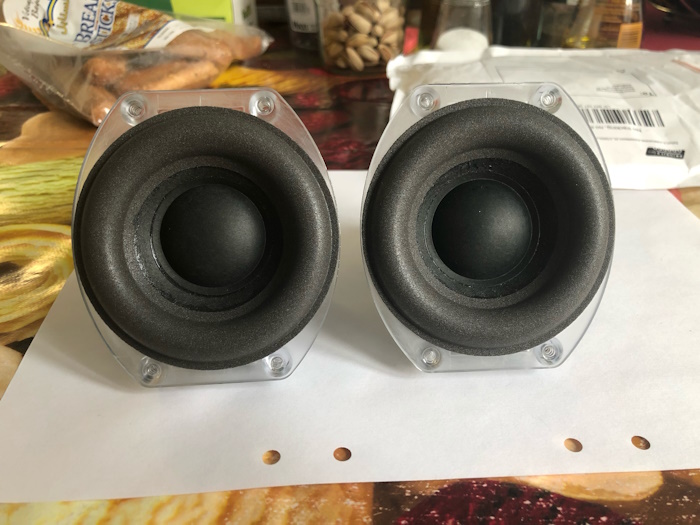
These are two JBL Atlas woofers after the overhaul. The woofers can now be returned to the mobile device.
Try to spare the refurbished woofers a bit for the first few days. The foam surround and the spider are new, and therefore still relatively stiff, the woofers need a number of hours to develop into their optimal sound.
Is the bass less than you were used to? Then the 'novelty' is the cause. Another cause is that the woofers played outside their specifications prior to the repair because the old foam surround and spider offered too little resistance. The new spider and foam edge offer a little too much resistance in the beginning. Time will solve that problem on its own.
© Good Hifi VOF