

 Nederlands
 Deutsch
Fit a new dust-cap
Replace a dust-cap by yourself
Every woofer has a dust cap. The function of the dust cap is to close off the air gap in which the speaker coil moves so that no dust or other dirt can enter it. Unfortunately dust caps are fragile. However, replacing one is relatively easy.
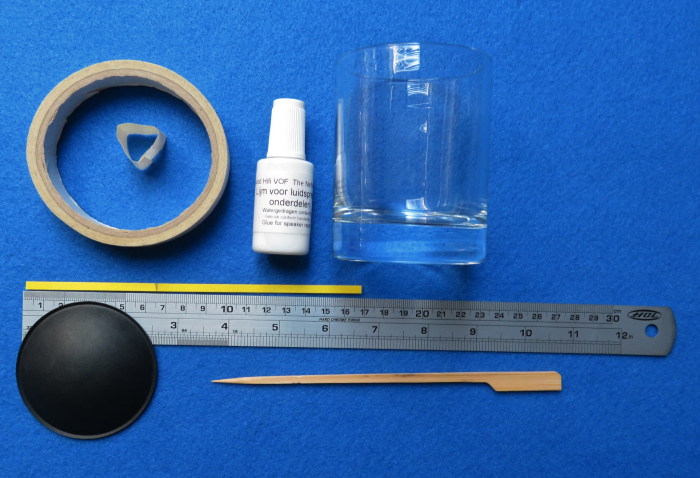
The required materials:
- painting / masking tape
- the right glue (see our glues in the product menu)
- a strip of paper
- a new dust cap (note, there are dust caps in many sizes, shapes and materials)
- a ruler
- a wooden spatula
- a glass or other object with an outside size equal to that of the dust cap
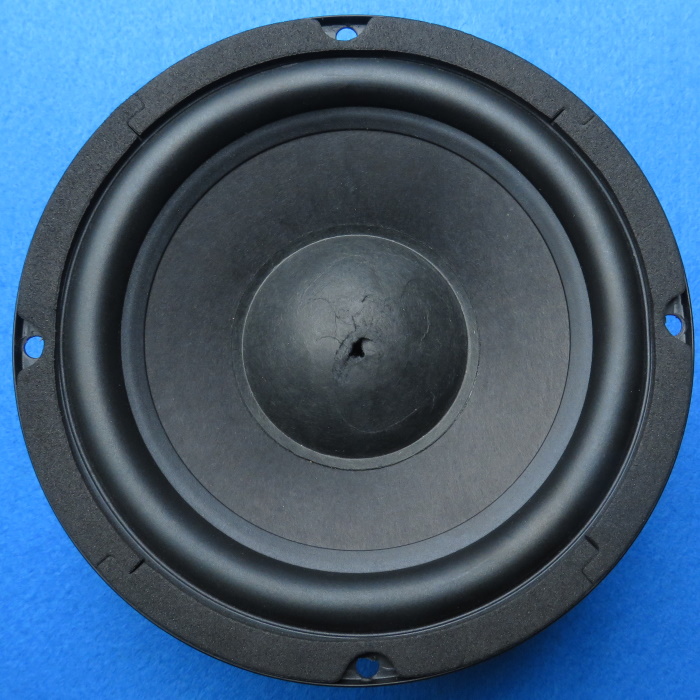
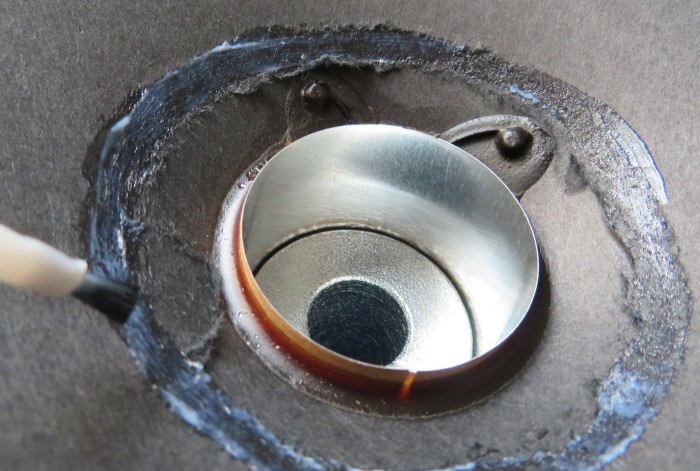
The broken dust cap. The dust cap underneath is both dented and perforated. Playing on would mean the end of the woofer in the long term. Because the woofer is no longer acoustically closed, it will no longer play according to the specifications.
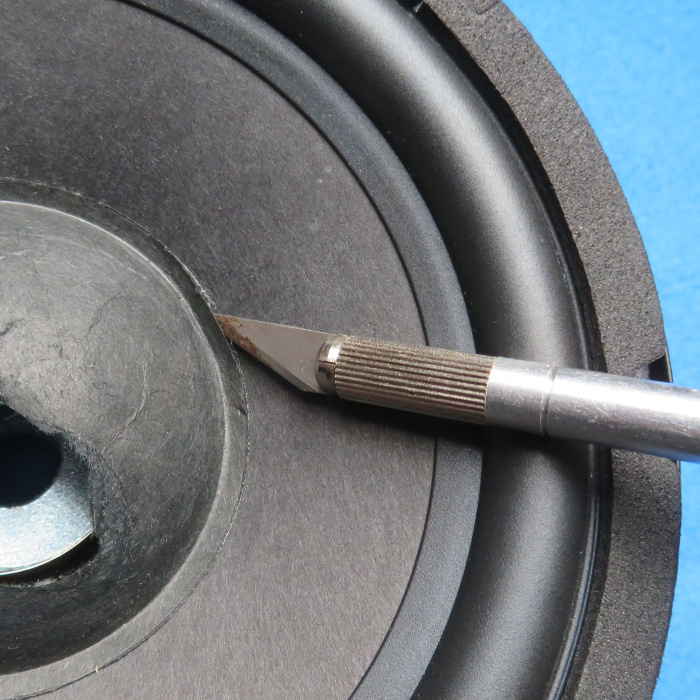
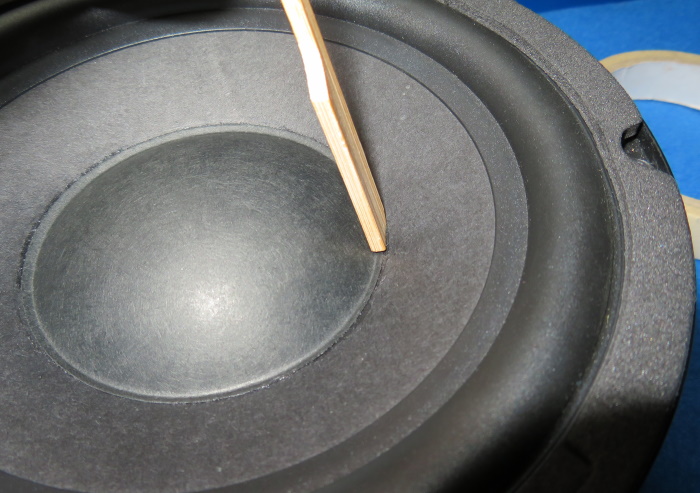
The old dust cap has to be removed. You do this carefully with a sharp knife. Be careful where to start! See below.
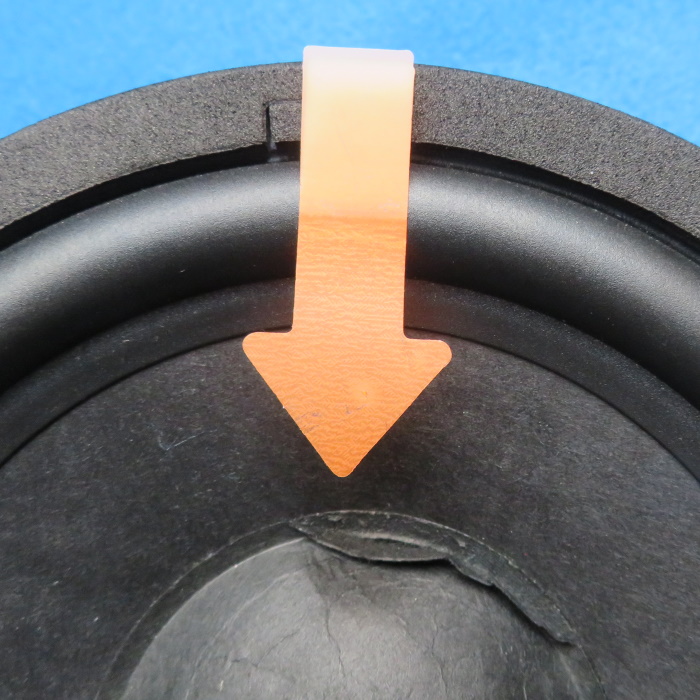
Start cutting on the right side! Many speakers have so-called tinsel wires (marked in red) under the dust cap. These connect the woofer connection terminal with the voicecoil. You can see where they are located at the rear of the speaker cone. Start removing the dust cap on the side opposite to the tinsel wires (at the green arrow). If you start on the other side and cut too deep, you run the risk of damaging the tinsel wires.
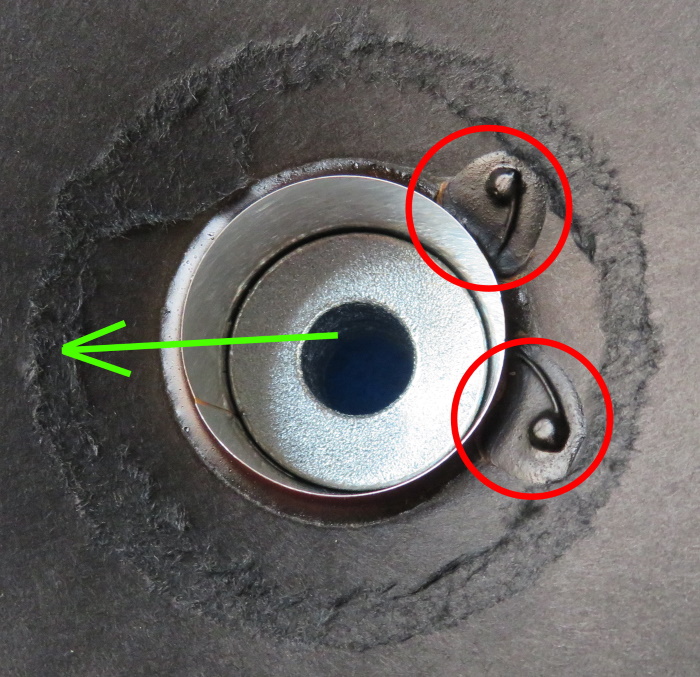
When removing the dust cover, always move it from the outside to the center in the direction of the arrow.
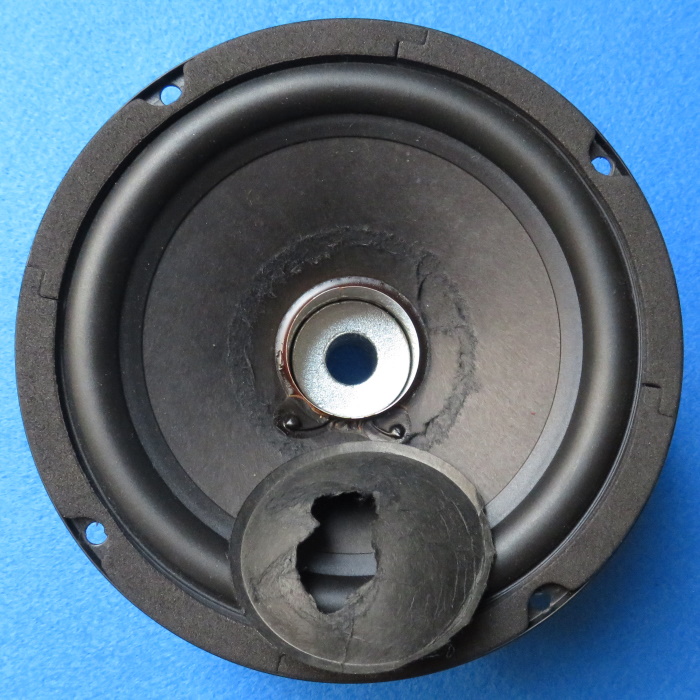
The dust cap is removed. With a paper speaker cone you will usually remove a tiny layer of paper.
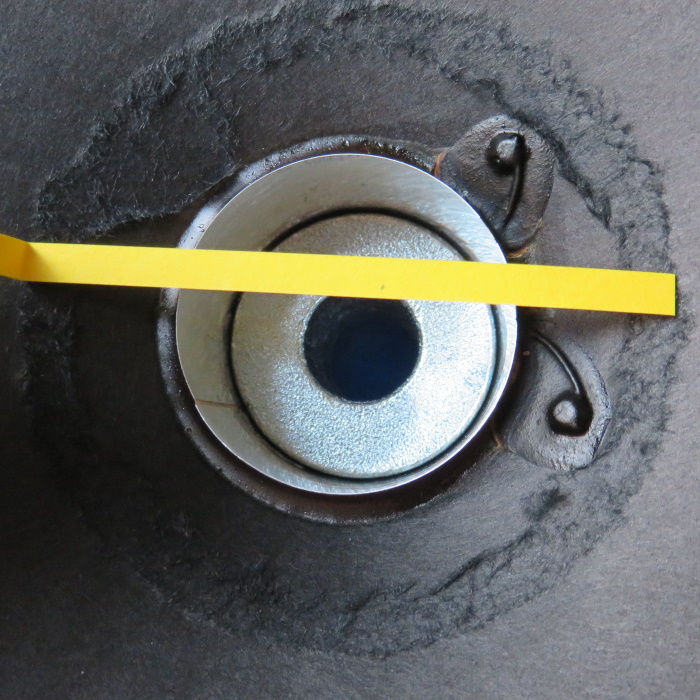
You can determine the size of the new dust cap with a strip of paper. The original dust cap is often deformed after removal and will provide you with unreliable sizes.
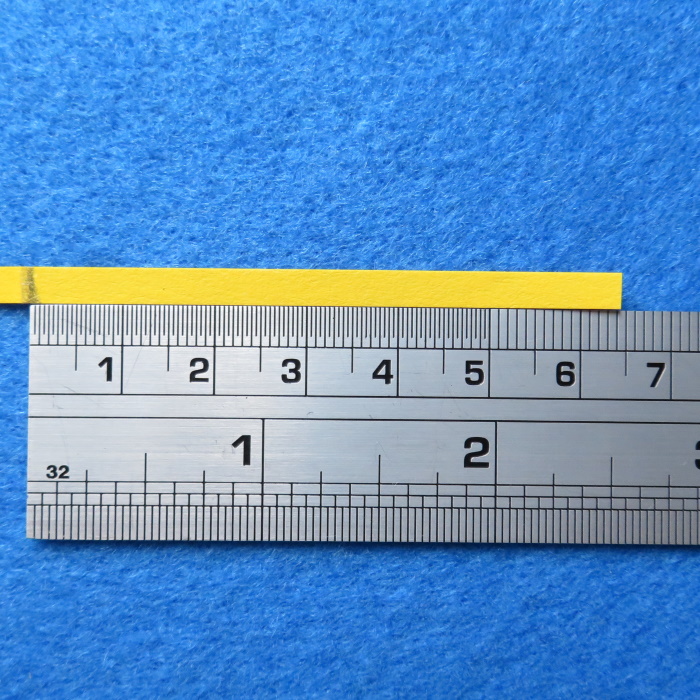
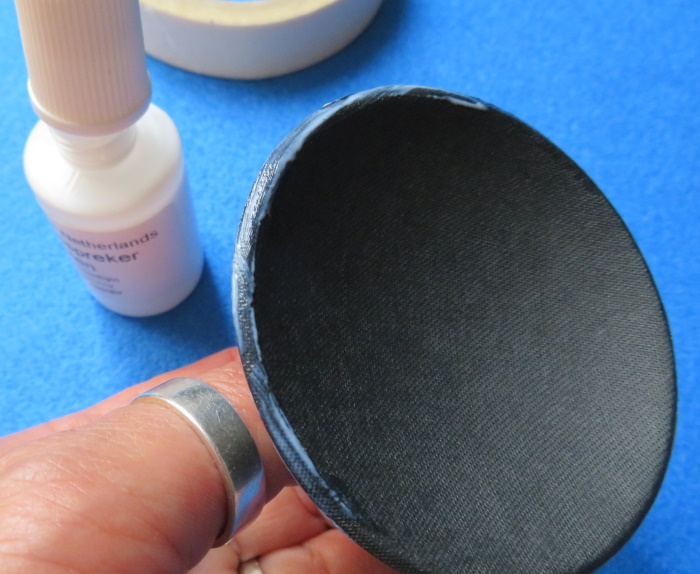
The dust cap of our woofer measured 74/75 mm. We replace the dust cap with a slightly larger one, which looks a lot nicer. We chose 80 mm.
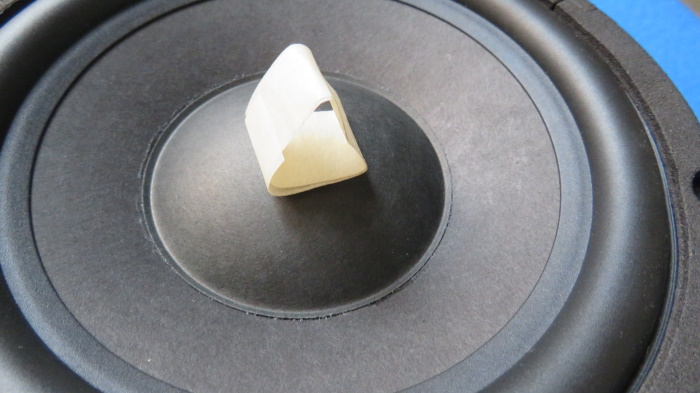
After the new dust cover has been placed on the cone to determine the 'glue zone', we apply glue to the cone of the speaker.
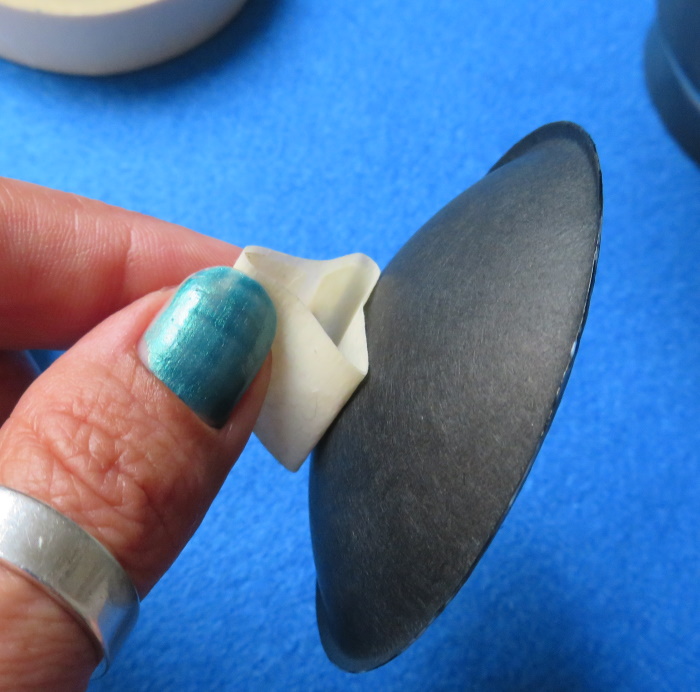
Make a 'handle' of masking tape to easily handle the new dust cap.
Apply glue to the (adhesive) edge of the dust cap.
Fit the dust cap on the speaker cone and carefully remove the masking tape.
Rub / press the glue edge of the dust cap with a wooden spatula.
Place a weight on the dust cap. Often a suitable glass / bowl can be found for this. Let it dry for 8-12 hours.

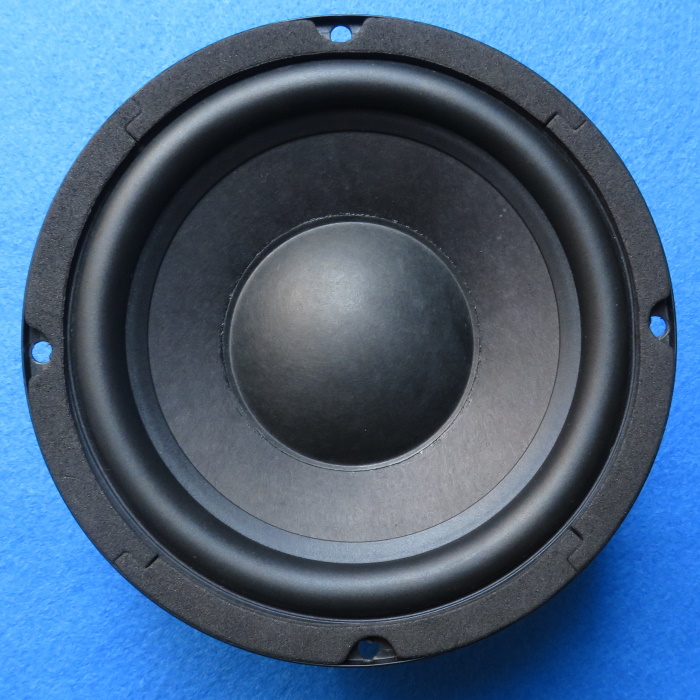
Final result.
© Good Hifi VOF