

 Nederlands
 Deutsch
Refoam manual
Manual for refoaming woofer.
Note: Some images are clickable, you will get a larger version.
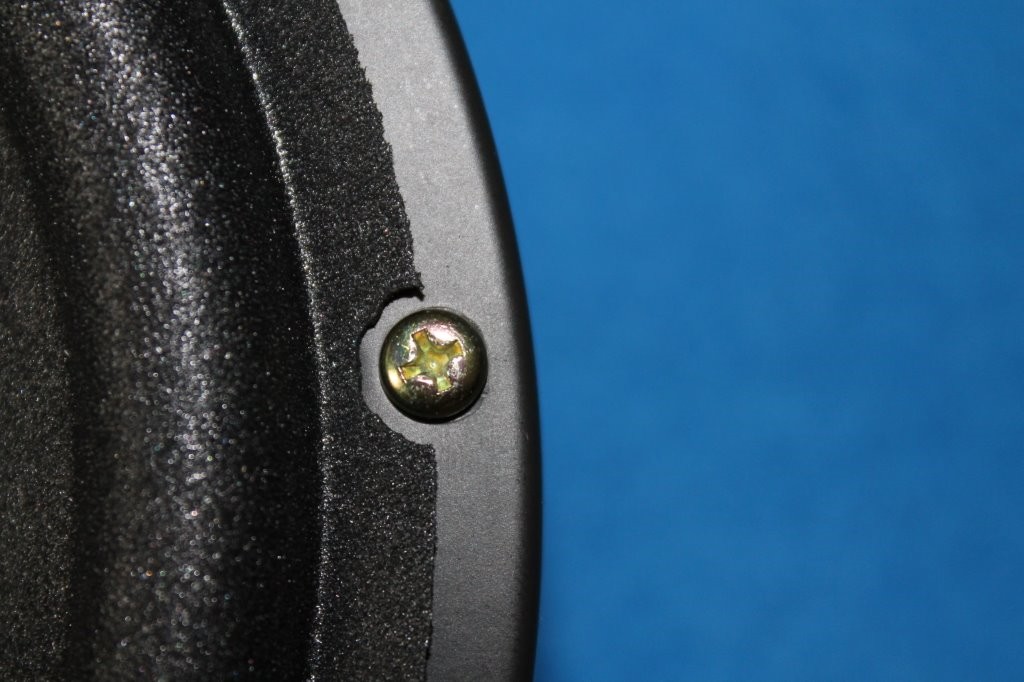
STEP ONE: REMOVE THE WOOFER FROM THE CABINET
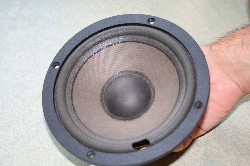
Use the right screwdriver and remove the woofer from the cabinet. Beware that you do not accidentally damage the woofer! Disconnect the cables from the woofer and mark the polarity of the cables, if needed mark the terminal as well. This makes the connection of the cables after the repair easier. It is very important that the cables are connected in the same manner after the repair. If you need to 'desolder' the cables take care that you not overheat.
STEP 2: REMOVE THE GASKET
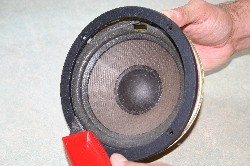
If the speaker has a gasket then it should be removed. A sharp knife can help. Work slowly and carefully and make sure you do not damage the speaker cone. Always work 'away from the speaker cone', so if you slip you do not damage the cone. If you work gently the gasket can often be reused. If you damage the gaskets you can order new ones.
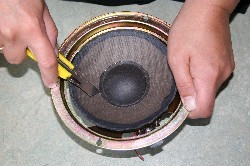
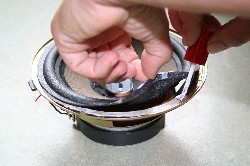
STEP THREE: REMOVE THE OLD SURROUND
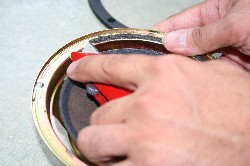
Carefully remove the old SURROUND. 'Scrape' with a Stanley knife speaker cone and frame. Work gently and accurately. Particularly when cleaning the (fragile) edge of the speakercone.Using methylated spirits or alcohol can help you to weaken the foam or glue. There are special "solvers" in the market but alcohol works just as well and is a lot cheaper. Don't use stuff like sticker remover, glue remover or nail polish remover. These contain chemicals / oil which might damage your speaker or make gluing very difficult.
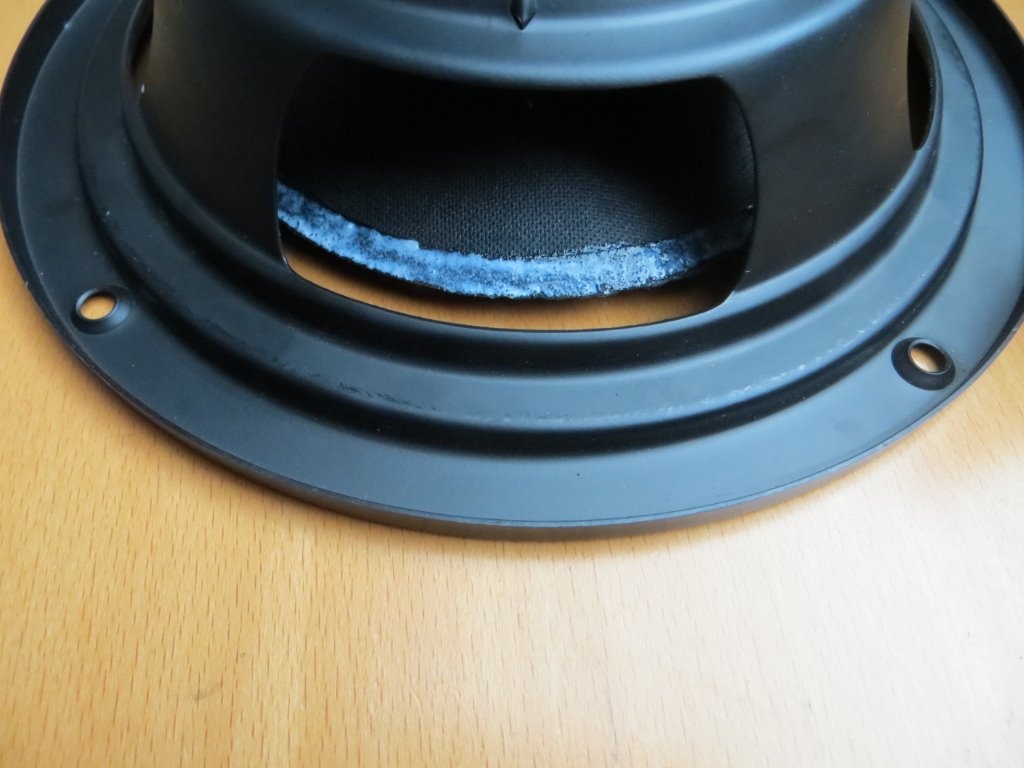
Try to make the surfaces as clean as possible. The frame of the woofer has to be 100% clean, otherwise the adhesive will not bond well. For the speaker cone this is often difficult to achieve. Remove as much as possible without damaging the woofer. Is the old surround glued behind the speaker cone, try to remove as much as possible. Use your fingernail in that case to remove as much foam as possible. In this case is recommended to glue the new surround to the front of the speaker cone - this area is much easier ro work on.
Beware of the old foam residue! These can cause nasty stains!
STEP FOUR: GLUE THE NEW SURROUND TO THE SPEAKER CONE
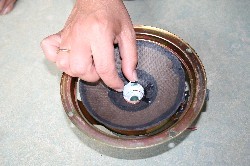
Apply glue to glue the inner flip of the new speaker surround and the edge of the speaker cone. Fit the new speaker surround centered on the woofer. Press lightly. Take your time, work slowly and carefully. The adhesive shows a processing time of 30 minutes to an hour.
It is recommended that you use (for example a pan / dish) somethins on the speaker cone that can impose continuous pressure. That way you get a perfect adhesion of the glue. Professionals use this circular molds which they impose on the glued edge. (Make sure the weight is not too large - 500 gr.'s Usually more than enough ....).
If you want to glue the surround to back of the cone.....
you should apply glue to both the speaker cone and the surround as well.
STEP VIFE: CENTERING
The centering of the woofer is the trickiest part according to our customers. Yet it is not all too difficult. There are three methods to center:
- The 'cloth peg' method
- The 'Sound sample' method
- The 'shimming' method
The 'cloth peg' method can be used with any woofer and is the easiest, the 'shimming method' is the most reliable. We will explain both.
CENTERING METHOD 1: CLOTHES PEGS
This method is based on centering the voice coil in the magnet-gap using clothes pegs/
You need:
- 4 (or more if you like) clothes pegs
- small cubes if needed
- glue

We assume you already glued the surround to the speaker cone.
Step 1: centrering the 'horizontae axis':
Place a cloth peg on the right side of the woofer fixing the outer lip of the surround the the frame. If needed put a cube between the surround/frame and the clogh peg.

Place a cloth peg on the left side of the woofer fixing the outer lip of the surround the the frame.

Push the woofer slightly inwards on the left side of the speaker cone, using you hand. Feel and listen...

Push the woofer slightly inwards on the right side of the speaker cone, using you hand. Feel and listen...

If you can hear/feel the voice coil making contact with the magnet move the surround a little and put the cloth pegs back into place. Feel again until you can press the woofer on both the left and the righ side and it 'runs free'.
If the rubbing occurs while pressing on the left side, move the surround to the right just a little bit and vice versa. If the woofer is centered on this axis leave the cloth pegs in place and move on to the next step.
Step 2: centrering the 'vertical axis':
Place a cloth peg on the upper side of the woofer fixing the outer lip of the surround the the frame. If needed put a cube between the surround/frame and the clogh peg.

Place a cloth peg on the lower side of the woofer fixing the outer lip of the surround the the frame

Push the woofer slightly inwards on the upper side of the speaker cone, using you hand. Feel and listen...

Push the woofer slightly inwards on the lower side of the speaker cone, using you hand. Feel and listen...

Do as you did before, but now move the surround up a little bit if it rubs in the lower area and vice versa. The woofer is now also centered on the vertical axis. Ensure that all four clips now remain in place. You should now be able to push the woofer inwards at any spot and it should 'run free'.
Step 3: glue the outer flip of the surround to the frame
Leave the four pegs in place and glue the outer flip between the pegs to the frame, lifting it slightly when using the adhesive. Let the glue dry. You might want to clamp the glued parts of the surround using more cloth pegs. Remove the four initial cloth pegs after the glue had dried and glue the parts of the surround that were stuck to the frame (under the four pegs).

If the new foam surround covers the screw holes, cut the foam surround so that the screw holes remain free. Otherwise you run the risk the foam surround will deform when tightening the screws.
CENTER METHOD 2: 'SOUND SAMPLE METHOD'
With this method you glue the surround to the cone, after which you (gently) play a sound signal over the unit. While the woofer is running freely and the signal is played out undistorted, glue (possibly in combination with the use of cloth pegs) the surround on the frame. We have the following sound signals (samples) available for this:
A sound sample (loop) that runs from 10-1000 hz, very suitable for mid-low units. You can download it here.
A sound sample (loop) that runs from 20-200 hz, very suitable for woofers. You can download it here.
An extra long sound sample (loop) that runs from 20-200 hz, very suitable for woofers. You can download it here.
An alternative is to connect the woofer to a 4.5 Volt battery, and when the surround is glued to the cone, connect the woofer to the battery. The current from the battery causes the woofer to 'move out'. You can use that motion to coat the frame with glue. When the connection to the battery is broken, the woofer 'sinks' again allowing you to glue the surround to the woofer frame.
CENTERING METHOD 3: SHIMMING
This method is based on removing the dust-cap from the woofer and put 'shims' between the voice coil and the magnet-gap so the voice coil is placed exactly in the center of the magnet-gap. Pls see the detailed picture below.
For this method you need:
- A sharp knive to remove the dust-cap
- Four or more shims - we recommend not tu use paper shims, use plastic. We recommend shims made of foto-film
- Glue
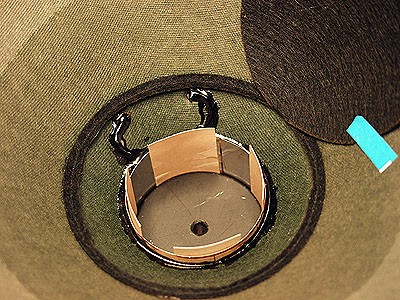
Step 1: remove the dust-cap
Place the woofer horizontally on the back. Remove the dust cover by gently cutting it loose. Under the dust cover shows the voice-coil in the air gap of the magnet. If the dust-cap is carefully removed you can often reuse it. It is also possible to not completely separate the dust cover, but to to leave it fixed a little, and then to be fold the dust-cap backwards, attaching it to the woofer with a little bit of tape. If the dust-cap gets damaged ... No worries, new dust caps are available in our shop.
Step 2: put the shims in place
Behind the dust you see the voice-coil that is centered in the air gap of the magnet. Put the spacers (shims) between the magnet and the coil, typically use four. At a larger coil you may want to use more. Pls use spacers/shims that are long enough so you can easily pull them out after use. If you decide to use paper, make sure those do not get wet! Place the spacers (shims) so that the voice-coil is exactly in the middle of the air gap. The voice-coil is now centered and fixed in the air-gap, by the spacers, the coil can no longer move in the air gap.
Step 3: glue the surround to the speakerframe
By placing the spacers the voice-coil has been centered. Now glue the surround to the frame. Let the glue dry for about one night. The glued parts may also be fixed with pegs.
Is the ring on the frame glued and and the glue is dry, remove the spacers / shims and put the dust-cap back in place. It's best you use a special glue for the dust-cap.
STEP SIX: PUT THE GASKET BACK INTO PLACE.
Did your woofer have a gasket, glue the gasket over the new surrounds/frame on the woofer. You can often reuse old gasket, or you can order new ones.
STEP SEVEN: PUT THE WOOFER BACK IN THE CABINET
The woofer has a new surround and can be placed back in the cabinet. Attach the wires first. Observe the polarity and use the marks you made earlier. Sometimes a 'sealing ring' is placed between the woofer and the cabinet to allow airtight closing. If so, place them back between woofer and cabinet. Repeat these steps for the other woofer - woofers are best refoamed in pairs.
Note: Seller of speaker edges accepts no responsibility for replacing speaker edges by third parties. See also general conditions.
© Good Hifi VOF